Want to save your favorite Disney+ shows and movies but hit a wall with recording restrictions? Disney+ has copyright protections, which often lead to issues like black screens or poor playback when trying to screen record. This can be frustrating, especially when you just want offline access or to preserve memorable moments for personal use.
Don’t worry—there are ways to bypass these hurdles safely and effectively. In this guide, we’ll explore reliable methods to screen record Disney+ content on various devices. Let’s make recording hassle-free so you can enjoy Disney+ your way!
📌 Related Articles:
Why Do I Get a Black Screen When Recording Disney Plus
If you’ve ever attempted to record Disney+ movies and TV shows directly on Windows, Mac, iPhone, or Android, whether you’re using Chrome, Safari, Edge, or other streaming platforms for Disney Plus, the window immediately goes black when you start screen recording. The likely reasons for this are:
- Copyright Protection: Disney+ employs various measures such as High-bandwidth Digital Content Protection (HDCP) to protect its content, so it detects screen recording actions and prevents further capture of the screen.
- Technical Limitations: The screen recording software or hardware you’re using may have compatibility issues or restrictions, causing it to be ineffective in screen recording content from Disney Plus.
Fortunately, through our testing, we’ve discovered some ways to avoid the black screen issue to screen record Disney+ movies successfully. Just read on, and follow the detailed steps to get things done!
📌 Tips:
Except for screen recording, downloading Disney + videos to DRM-free MP4 right to your device is another good choice. You can resort to a professional Disney+ video downloader for help in the last part.
Bonus: Full Video Walkthrough
How to Screen Record Disney Plus on Mac/PC
Both macOS and Windows come with built-in screen recording tools, and you can indeed use them to screen record DisneyPlus videos. To get rid of the black screen, you just need to download the Mozilla Firefox browser and follow the steps below to screen record Disney Plus on Mac/PC.
How Can I Screen Record Disney Plus on Mac
For Mac users, there are two official ways to record Disney Plus movies. One is the Screenshot toolbar for macOS Mojave and later, and the other is the QuickTime Player for all Mac operating systems. Remember, you should stream the movie or episode on Firefox rather than the Disney Plus app, Safari, or Chrome as mentioned above.
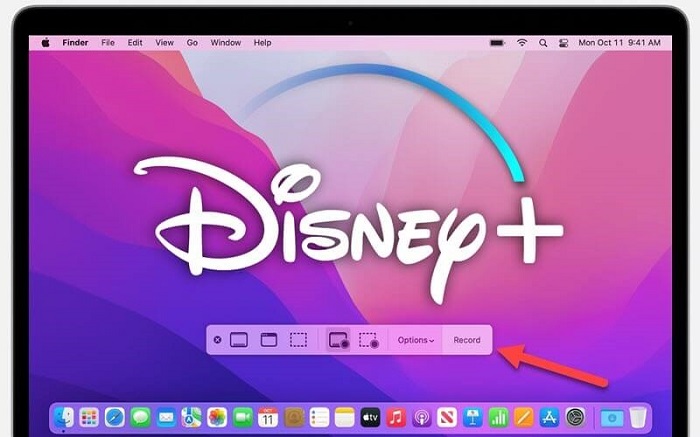
In this case, I’ll show you how to screen record Disney Plus videos on MacBook or iMac using QuickTime player.
- Launch the QuickTime player from your Applications folder.
- Click the File tab on the top followed by New Screen Recording.
- Click Options to set Microphone to None and don’t Show Mouse Clicks in Recording.
- Hit the Record button to start recording and choose to record the entire screen or selected area.
- Go to Disney Plus and choose a title to play on Firefox in the recording. When the title is approaching the end, press Command-Control-Esc (Escape) to stop recording. Then, you’re able to play or edit the video.
Note that the recording will be opened by default after you stop the recording.
Note:
QuickTime Player can not record internal sound, which means that you can not capture sound on Disney Plus videos. You have to use a third-party tool like BlackHole to record the audio. If you simply want to download Disney Plus movies on Mac, opt for Disney Plus video downloaders, like MovPilot. It is capable of saving high-quality Disney Plus movies with original audio tracks and subtitles.
How to Screen Record Disney Plus on Windows PC
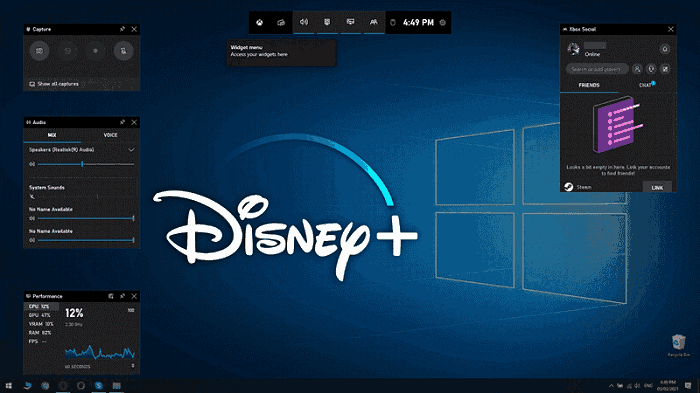
Windows 10 and 11 users can utilize the Xbox game bar to record Disney Plus content. You can tell from its name. This tool was initially designed for game players but can work as a general recorder. However, you cannot stream the video on the Disney Plus app or Google Chrome, or you’ll only get a black screen instead. Now, let’s see how to screen record Disney Plus on Windows PC.
- Press the Windows key + G to open up the Xbox Game Bar from your desktop.
- Click the Record button in the middle or press the Windows key + Alt + R to start recording your screen.
- Turn off the microphone by pressing the Windows key + Alt + M and hide control windows by pressing the Windows key + G.
- Visit Disney Plus on Firefox and stream the video you want to record.
- Wait until the video ends, and press Windows Key + Alt + R to stop recording. You can find your recording in This PC – Videos – Captures.
Xbox game bar is easy to use, but it will automatically end the recording when you switch windows. Make sure only Xbox game bar is running on the screen while screen recording. Otherwise, you will only get clips. To have Disney Plus downloads without any interruptions, it is advisable to use professional Disney Plus video downloaders, such as MovPilot, to save multiple Disney Plus movies of excellent quality in a batch.
How to Screen Record Disney Plus on iPhone/Android
If you like streaming Disney Plus videos on your iPhone or Android, you may consider using its default screen recorder to capture the screen when playing a Disney Plus movie or episode. However, you’ll also get a black screen in return.
In this case, you’ll need to use Rave to play Disney+ videos in the first place. Rave is a free ad-based application that brings various mainstream video platforms together and enables users to watch videos with friends. Now, let’s learn how to screen record Disney Plus on iPhone/iPad/Android.
Before getting started, make sure you meet the below requirements:
- Requires iOS 13 or above
- Requires Android 6 or above
- You must have a paid subscription to the corresponding streaming service
Step 1. Launch Rave after you install the app on your device. Then, tap the + button and choose Disney +. You’ll need to log in to your Disney Plus account in Rave.
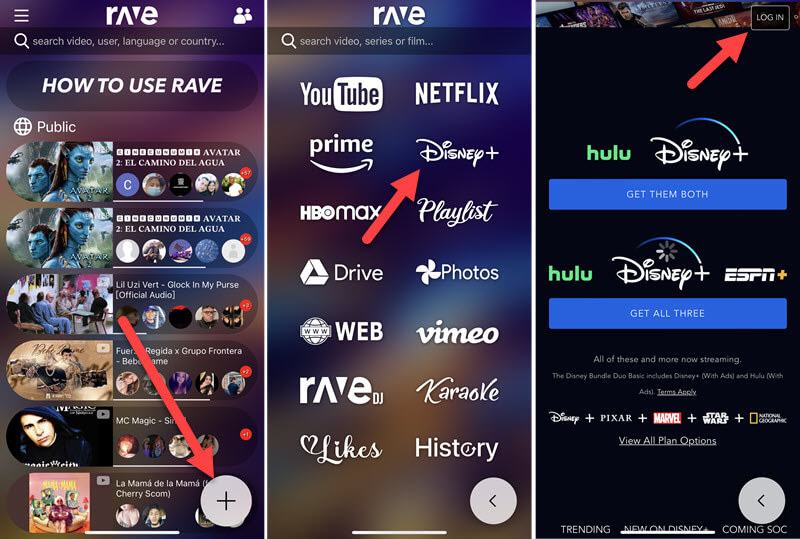
Step 2. Choose a movie or TV show you want to record. Then, go to the Gear icon to choose the video quality, audio track, and subtitles to your liking. When it starts playing, extend to full screen and pause the video.
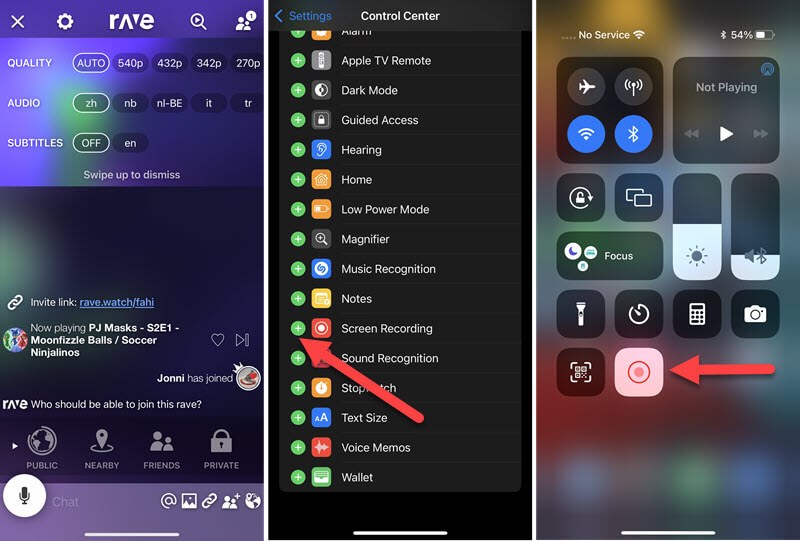
Step 3. Set up quick access to the default screen recorder on your iPhone and Android.
- For iPhone users: Go to Settings – Control Center to add Screen Recording for quick access. Now, Swipe down the Control Center and tap the Record
- For Android users: Swipe down the Quick Settings panel – Button to add a Screen recorder to the panel. Now, back to the Quick Settings panel and tap the Screen recorder
Step 4. During the three-second countdown, quickly go back and play the video in Rave.
Step 5. When done, tap the red status bar at the top of your screen and tap Stop. The recording will be saved to the local storage.
Bonus Tip: Get Disney Plus Free Downloads Directly
It’s time-consuming to record Disney Plus videos, which may also be disturbed by floating widgets and poor internet connectivity. Also, you cannot do anything while just waiting for the end of the movie or episode. What’s worse, the recorded videos are always of low resolution.
Therefore, if you want the full episodes of Disney videos but not just a short clip, MovPilot Disney Plus Video Downloader may be a better option to choose compared to screen recording. This dedicated software can help you convert Disney content to HD MP4/MKV common formats for free, and save Disney Plus videos to your laptop easily. The DRM-free downloads are playable and transferable on any device.
👍 More Features of MovPilot Disney Plus Video Downloader:
- Rip any Disney+ content at a 5X faster speed without quality loss.
- Retain original multilingual audio tracks and subtitles for downloads.
- Keep Dolby Atmos 5.1 surround sound for cinema-like viewing experiences.
FAQs about Screen Recording Disney Plus
Is It Illegal to Screen Record Disney Plus?
Most of the content in Disney Plus is copyright-protected by DRM to prevent its content from being distributed, recorded, downloaded, or shared for commercial purposes, which means it’s illegal if you intend to make a profit out of the recordings or downloads from Disney Plus without authorization.
However, it’s totally okay if you just record or download Disney Plus movies or TV shows for personal use without business intentions, such as education, personal collections, and charity.
What are the Best Recording Tools to Screen Record Disney Plus Episodes?
In all honesty, the screen recording software that comes with the system on phones and computers is now very useful, and they do work for recording Disney +.
Windows: Xbox Game Bar
macOS: QuickTime Player
iPhone/Android: The built-in screen recording tool in the Control Center.
However, recording Disney Plus is a very time-consuming task. Here we recommend another very useful tool: FonePaw Screen Recorder. Its Task Schedule feature allows you to preset the recording time based on the length of the video, so you don’t have to wait in front of the computer until the recording is finished.
💡 You May Like:
Can You Screen Share Disney+ Contents?
Yes. Users with Disney+ Premium, Disney Bundle Trio Premium, and Legacy Disney Bundle subscribers, can create a shared streaming experience on Disney+ using SharePlay* on iPhones, iPads, and Apple TV.
Conclusion
If you prefer not to use third-party software, you can use the built-in screen recorder on your device to capture Disney Plus videos, but keep in mind that don’t play Disney Plus content on its app or Chromium-based browsers to prevent capturing a black screen. Alternatively, you can just download Disney Plus videos directly to your Windows or Mac with MovPilot Disney Plus Video Downloader. This program allows unlimited DRM-free downloads for HD playback on any device without restrictions.
MovPilot Disney Plus Video Downloader
Download Disney Plus Movies and Shows to Watch Offline Easily!