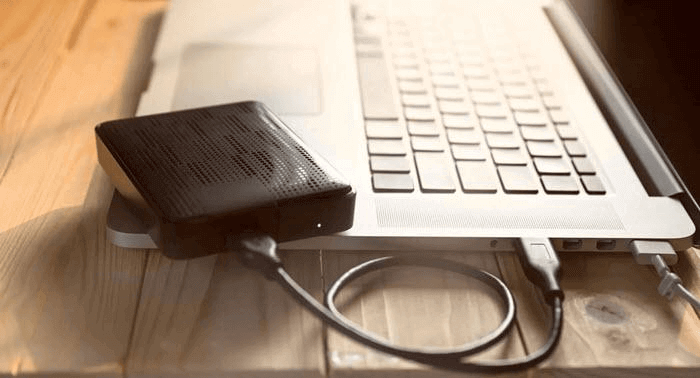
Å laste ned og lagre Netflix-videoer på en ekstern harddisk er en smart måte å nyte fleksibel offline avspilling på. Ved å bruke en profesjonell Netflix-videonedlaster kan du enkelt laste ned Netflix-innhold på din bærbare eller Mac i universelt kompatible formater som MP4. Denne tilnærmingen lar deg overføre dem til en ekstern harddisk for langtidslagring.
Nedenfor gir vi en detaljert, trinn-for-trinn-guide for å hjelpe deg med å laste ned Netflix-filmer til ekstern harddisk og enkelt bygge Netflix-filmbiblioteket samtidig som du frigjør plass på enheten din.
Kan jeg laste ned Netflix-filmer direkte til en ekstern harddisk?
Det korte svaret er Ingen. Netflix tillater ikke offisielt overføring eller flytting av nedlastede titler utenfor Netflix-appen. Alle nedlastinger er kryptert og låst i appen for å beskytte lisensavtaler. Det betyr at selv om du finner nedlastingsfilene fra nettet på enheten din, kan de ikke bare kopieres eller spilles av på en ekstern harddisk eller andre mediespillere.
Heldigvis finnes det løsninger og alternative metoder du kan se nærmere på. Noen alternativer kan ha sine egne risikoer, inkludert kvalitetstap, begrensede funksjoner eller til og med potensielt brudd på Netflix sine tjenestevilkår. Men i den følgende delen vil vi anbefale et ultimate valg med den beste Netflix-filmnedlasteren. Bare fortsett å lese og lær hvordan du laster ned Netflix-filmer til PC/ekstern harddisk nå!
Note: Sørg for at du kun laster ned Netflix-filmer til personlig bruk.
Del 1. Last ned Netflix-filmer direkte til ekstern harddisk
For å lagre Netflix-videoer direkte på en ekstern harddisk, trenger du et kraftig og pålitelig tredjepartsverktøy. Gå MovPilot Netflix Video Nedlaster, den ultimate løsningen for problemfri nedlasting.
Med MovPilot kan du fleksibelt Last ned Netflix-filmer og TV-serier i fantastisk 1080P kvalitet, velge mellom MP4 eller MKV formater. Verktøyet lar deg lagre Netflix-innhold direkte på harddisken din, og sikrer at favoritttitlene dine alltid er tilgjengelige uten begrensninger. I tillegg er alle nedlastinger DRM-fri, slik at du kan overføre dem til en hvilken som helst enhet eller mediespiller for ubegrenset visning. Bare nyt Netflix slik du vil!

Her kommer en detaljert veiledning for å lagre Netflix-filmer på ekstern harddisk med MovPilot:
TRINN 1. Gjør MovPilot Video Downloader klar
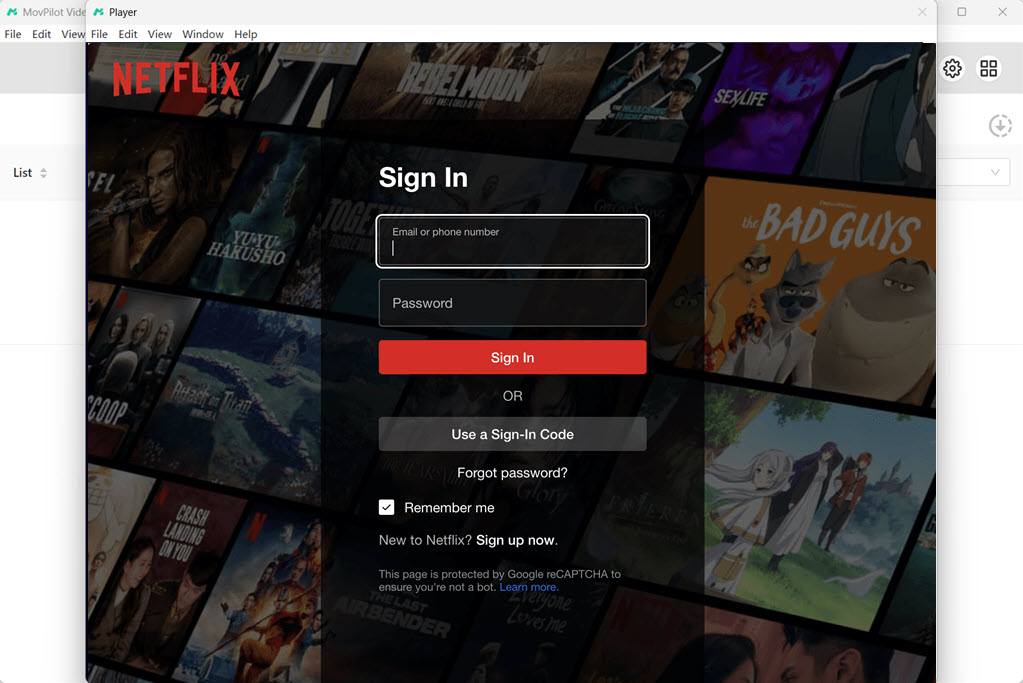
Last ned, installer og kjør MovPilot Netflix Video Downloader på datamaskinen din. Logg på med en aktiv Netflix-konto.
TRINN 2. Koble til den eksterne harddisken. Angi utdatamappe.
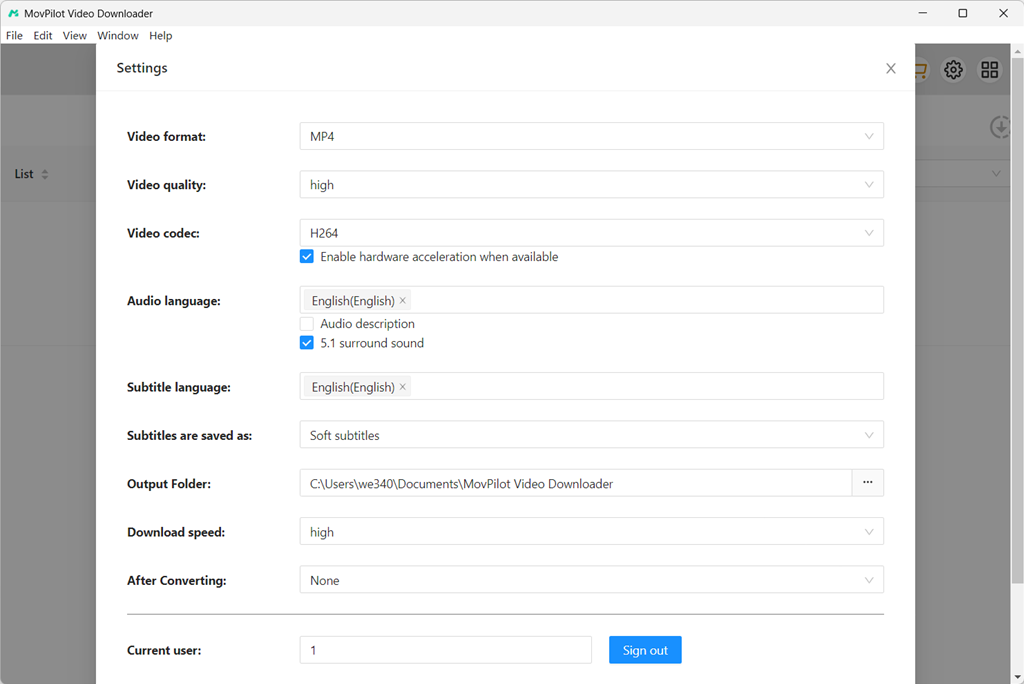
Koble den eksterne harddisken til datamaskinen.
Klikk på Innstillinger knappen øverst til høyre på MovPilot, sett den eksterne harddisken som utdatamappen. Dermed kan MovPilot lagre Netflix-filmer direkte på harddisken.
TRINN 3. Søk etter Netflix-videoer du vil ha
Du kan gå inn i navn av filmene eller TV-programmene du vil ha i søkeboksen, eller du kan kopiere og lime inn URL av Netflix-filmer eller TV-serier til søkeboksen for å få filmene.
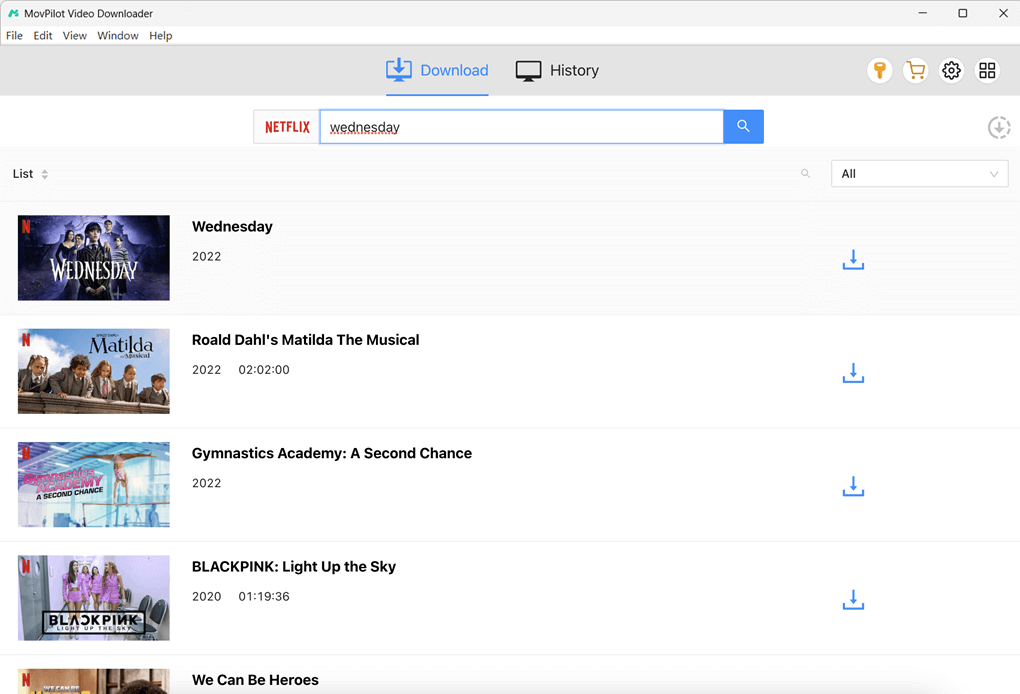
TRINN 4. Last ned Netflix-filmer til ekstern harddisk
For en enkelt film eller TV-serie, klikk på laste ned knappen for å laste den ned direkte.
For TV-serier med flere episoder, klikk på laste ned og velg deretter episodene du vil laste ned.
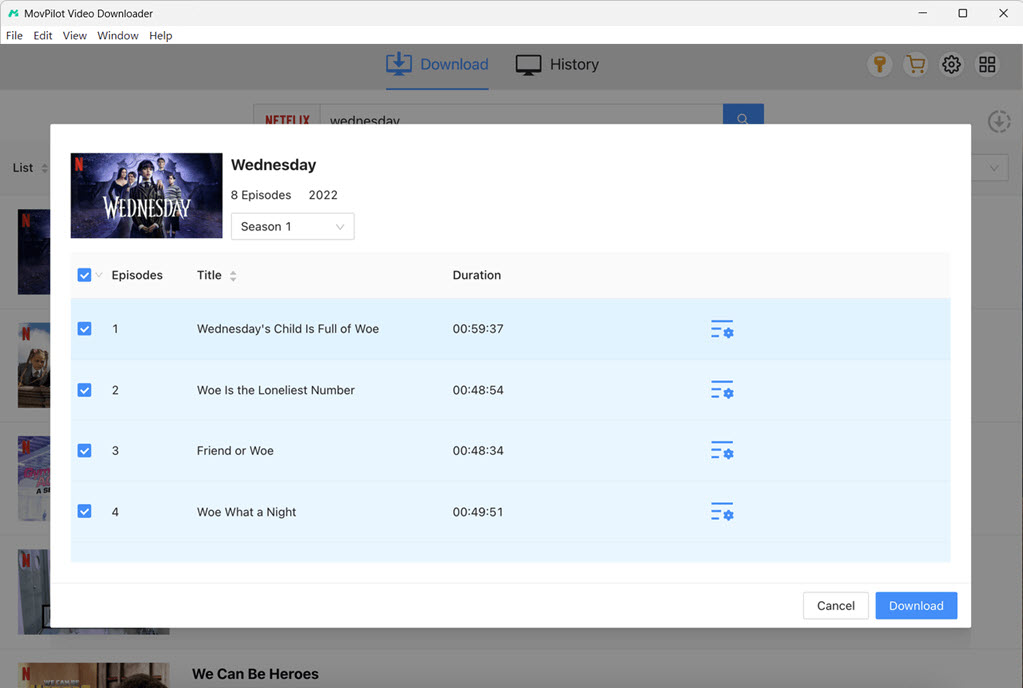
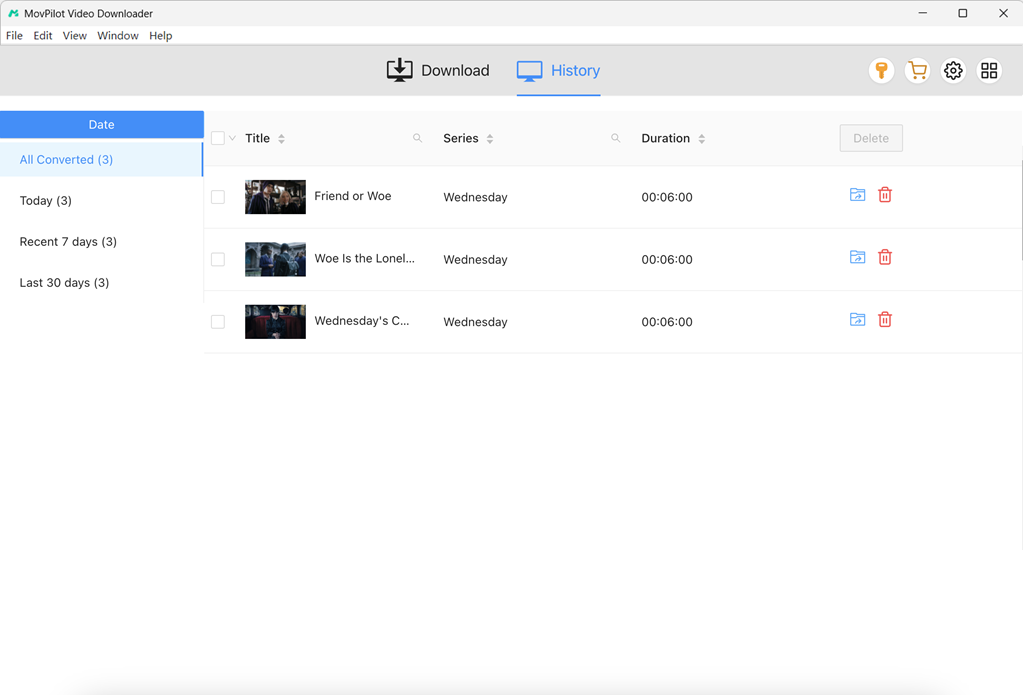
Umiddelbart vil MovPilot laste ned Netflix-filmer til ekstern harddisk for deg. Sjekk nedlastingene dine i «Historie». Du kan klikke på det blå mappeikonet for å finne Netflix-videonedlastingene på den eksterne harddisken for offline visning.
Bonus: Full videogjennomgang
Del 2. Last ned og overfør Netflix-filmer til ekstern harddisk
Hvis du ikke vil koble den eksterne harddisken til datamaskinen under nedlasting for å unngå problemer med overoppheting, kan du bruke den beste Netflix-videonedlasteren-MovPilot for å Last ned Netflix-filmer til MP4 til datamaskinens lagringsplass først, og overfør deretter Netflix-filmer til harddisken.
Trinn 1. Last ned, installer og start MovPilot Netflix Video Downloader på datamaskinen din. Logg på Netflix med kontoen du abonnerer på
Trinn 2. Søk etter ønskede Netflix-filmer, og last dem ned til datamaskinen din. For detaljerte trinn, hopp til Del 1.
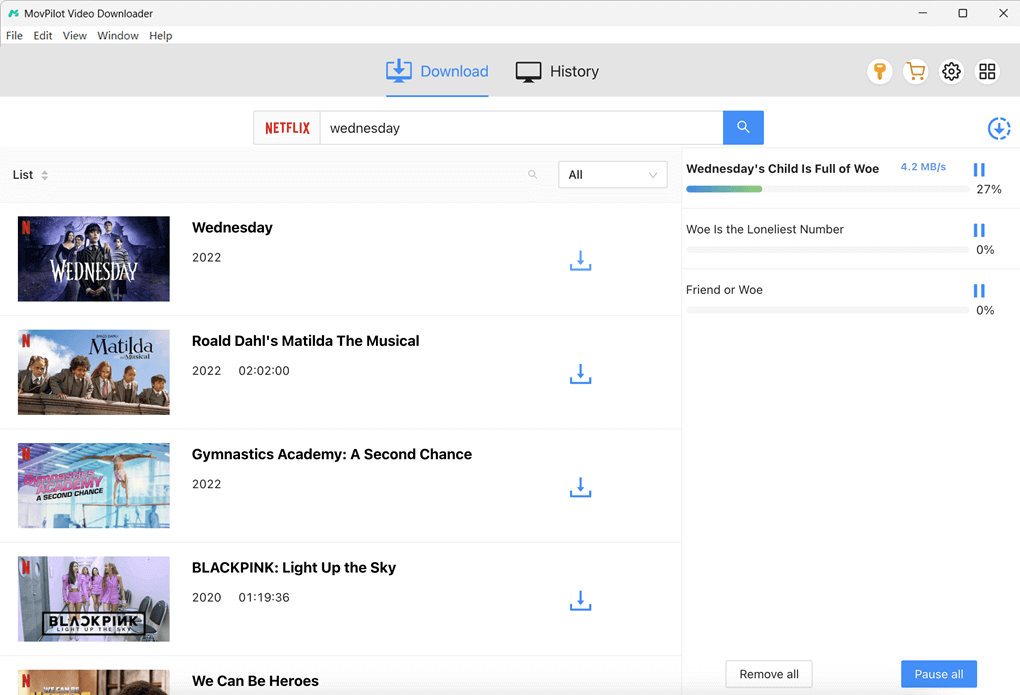
Trinn 3. Etter at videoene er lastet ned til datamaskinen, kobler du den eksterne harddisken til datamaskinen. Gå til MovPilots historie-fane, klikk på mappeikonet for å finne de nedlastede videoene på datamaskinen.

Trinn 4. Flytt de nedlastede videofilene fra datamaskinen til mappen på den eksterne harddisken.
Vanlige spørsmål om hvordan du laster ned Netflix-filmer til en ekstern harddisk
Hvilke enheter er best for å se Netflix offline?
Enheter som smarttelefoner, nettbrett og bærbare datamaskiner som støtter Netflix-appen er alle gode valg. iOS- og Android-enheter er spesielt praktiske fordi du kan laste ned filmer og serier direkte via Netflix-appen og se dem hvor som helst uten internettforbindelse. Jeg har nettopp bemerket at smart-TV-er og de fleste strømmeenheter ikke støtter visning uten nett.
Kan jeg speile Netflix-filmer til TV-en for avspilling?
Skjermspeiling av Netflix til en TV er ofte begrenset. Mange enheter og apper blokkerer videoen på grunn av Netflix' DRM-beskyttelse. Hvis du vil se Netflix på en større skjerm, kan du bruke den offisielle Netflix-appen på smart-TV-en din, en strømmeenhet som Chromecast eller Roku, eller koble den bærbare datamaskinen til TV-en med en HDMI-kabel. Disse metodene sikrer stabil avspilling og unngår svarte skjermer som vanligvis oppstår med speilingsbegrensninger.
Bunnlinjen
Selv om det virker umulig å lagre favoritt Netflix-videoene dine på en ekstern harddisk, spesielt når nedlastingsfunksjonen er kuttet ned på Netflix Windows-appen, kan du gå til dedikert Netflix-videonedlaster. MovPilot Netflix Video Nedlaster er et pålitelig verktøy du kan prøve. Det kan hjelpe deg med å lagre Netflix-videoer på harddisken din i høy kvalitet, frigjøre PC-lagring og sikre permanent tilgang.
MovPilot Netflix Video Nedlaster
Last ned Netflix-filmer og -serier for å se enkelt uten nett!
